Creating A Pulse Synth Patch In Absynth
There are many ways to create music using a computer, and many philosophies on how deep you should go into the technology. Some are quite happy to browse through presets, while others like to build their own synthesisers from the ground up. While both approaches are perfectly valid, there is certainly a middle ground where knowing even a little bit about patch creation can open up a new realm of sonic exploration…
Notable By Its Absynth
Native Instruments’ Absynth has been a colossus of the software synth world for the past decade, and is still the go-to tool for many sound designers, soundtrack composers and electronic musicians alike. It comes with a plethora of fantastic sounds right out of the box, and its ‘Mutate’ function allows users to instantly create completely new sounds at the touch of a button.
However, to illustrate some of the other features under the hood, I’m going to run through the process of creating a pulse patch using Absynth’s envelope looping functionality…
Patch Work
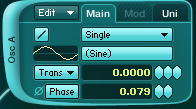
When you open an instance of Absynth, go to the ‘Patch’ tab by clicking the button on the top menu bar. There will be a single oscillator active here, generating a simple sine tone. Click on the staircase button and it will become a straight line, indicating high-quality mode.
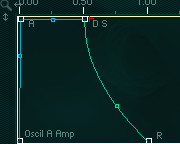
Clicking on the ‘Envelope’ tab button on the top menu bar takes you to – obviously enough – the envelope settings section, which reveals the initial ADSR (attack, decay, sustain, release) envelope for oscillator A.
If you press a key on your MIDI keyboard, you can see a white line moving through this envelope as the note plays back. If you hold down the key, the note begin by traversing the attack portion, it will then loop the sustain section of the envelope, and the release section is only played when you take your finger off the keyboard again.
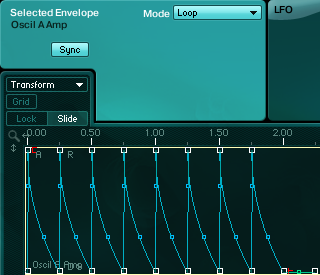
Above the ADSR section, we see the settings box for the selected oscillator. We need to change the mode from ‘sustain’ to ‘loop’, and activate the ‘sync’ option.
We then go into the ‘Transform’ drop down menu and choose ‘Generate AR pulse’, which will bring up a further option menu. You can change these if you like, but for the moment we can just leave them at their defaults and press OK.
If you now play a note, you will see (and hear) that it repeats in a cycle of 8, with 8 mini ADSR envelopes created.
You can click and drag the ADSR for each individual envelope to create variations in the pulse if desired – though it may be advisable to first turn on the grid and lock buttons. The grid can be activated in 1/8, 1/16 or 1/32 resolutions. A slower attack creates a more pulse-like effect, which you can adjust as desired.
Bringing In The Filter
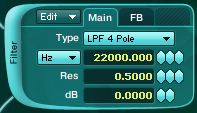
It’s not just the oscillator that you can apply the envelope to. If we go back to the ‘Patch’ tab, click on the slot below oscillator A to activate filter A. Raise the cutoff to 22kHz, and boost the resonance.
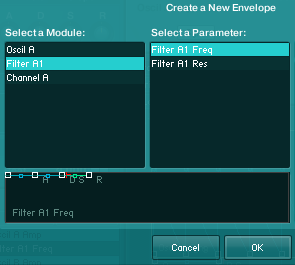
Back on the ‘Envelope’ tab, hit the +New button to the left of the ADSR section, under the ‘Available Envelopes’ header. This brings up a menu showing all available envelopes, and our newly created Filter A1. Select this, with filter frequency as the target parameter.
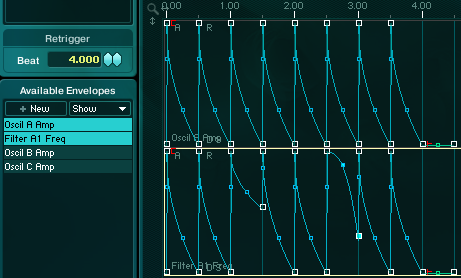
Now, filter A1’s ADSR is showing in the envelope section. If you shift-click on the ‘Oscil A Amp’ button on the left, this envelope will also appear in the envelope section.
Now, you can play with filter A1’s envelope by clicking and dragging, or you can copy the envelope from osc A. To do this, select osc A, go to the ‘Edit’ drop-down menu, select ‘copy envelope’, go to the filter A1 envelope, then select ‘paste envelope’ from the ‘Edit’ drop-down. Here I have changed the A1 filter envelopes for the 3rd and 6th loops, to create some rhythmic variation in the overall envelope.
For Added Effect
To add a bit more sonic texture to the pattern, go to the ‘Patch’ tab and activate the Waveshaper and Effect modultes in the Master section at the bottom. These can be tweaked as desired – click on the ‘Parameters’ button on the Effect module to bring up the effects options. Selecting the ‘Aetheriser’ is always an interesting option… bring up the feedback, change wet/dry balance, generally play around until you have something you like…
